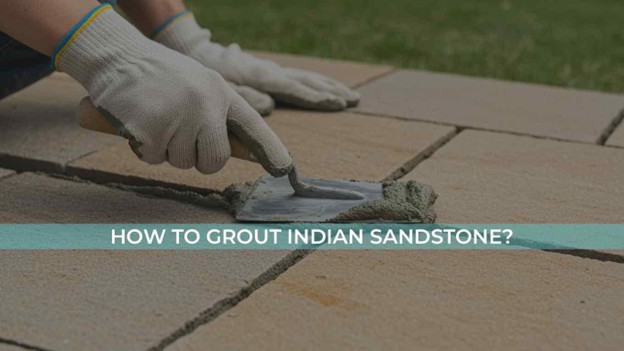
If you want a beautiful and long-lasting patio or garden path, natural stone paving is one of the most sought-after options in the UK. Not only are the colours beautifully subtle, but the texture also looks great and plays its role in the safety of your outdoor space. Its durability is outclassing, which depends not only on the installation process but also on the grouting.
Grouting Indian Sandstone is crucial for both aesthetic and functional purposes. A properly done grout seals the joints between the paving slabs, prevents weeds from growing between, and adds extra strength to the overall structure. If not done correctly, you should expect water ingress, loose slabs, and unsightly gaps that will surely compromise your patio’s durability.
In this guide, we will cover everything about how to grout Indian Sandstone, including:
- Choosing the right material
- Step-by-step application
- Expert tips for perfect results.
- Maintenance tips after grouting.
So, let’s dive in.
Why is Grouting Important for Indian Sandstone Paving?
If you are choosing Indian Sandstone, especially Kandla Grey or Raj Green Indian Sandstone, it is important to know that they are naturally porous. Along with its distinctive charm, it absorbs moisture and dirt between the gaps of the slabs if not sealed properly.
Proper grouting helps:
- Prevent Weed Growth: It fills the gaps where weeds could thrive.
- Enhance Structural Stability: It prevents shifting and locks the paving slabs in place.
- Improve Aesthetic Appeal: A need and smooth grout gives your patio slabs a finished look.
- Protect Against Frost Damage: It reduces water seeping through the gaps, preventing cracks during freezing conditions.
Royale Stones emphasises that the right grout and correct grouting application significantly impact the lifespan and appearance of your Indian Sandstone patio tiles.
Types of Grouting for Indian Sandstone
While you grout the joints of your Indian Sandstone, choose a material that is:
- Flexible: It withstands natural movements.
- Weatherproof: It is suitable for the weather conditions in your area.
- Compatible: Make sure that the grout is compatible with natural stone having low salt content to avoid staining the slabs.
Some of the most common Indian Sandstone grout options available in the market are:
Resin-based Jointing Compound
It is pre-mixed, easy to use, and is easily available in various colours. They harden when in contact with air, which makes them easy to use for beginners.

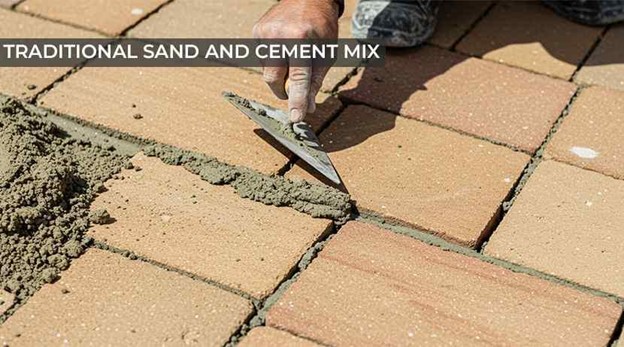
Traditional Sand and Cement Mix
Pointing Indian Sandstone with sand and cement is a budget-friendly option; however, it requires skills to apply in order to prevent the sandstone from staining.
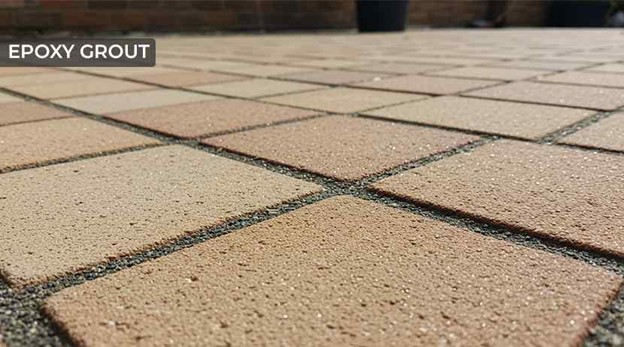
Epoxy Grout
These grouting options are extremely durable and known as the best grout for sandstone paving, but they are very expensive and hard to apply (Not beginner-friendly at all).
Pro-Tip: Most UK homeowners have the common question, “What is the best grout for a patio?” Always go with the resin-based grout if you are a beginner, especially for Indian Sandstone 900 x 600, as they are mostly preferred for their simplicity and stain-resistant properties.
How to Grout Indian Sandstone Paving
In this step-by-step guide, you will notice that grouting is not only about filling the gaps between the tiles; it’s about precision and proper timing. How to point paving slabs without staining, you may ask? Let’s find out.
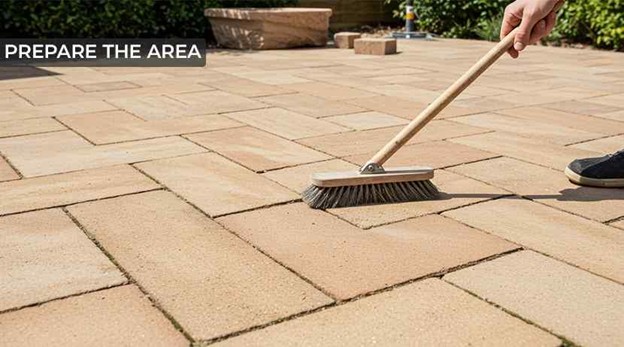
Step 1: Prepare the Area
Make sure that your Indian Sandstone paving slabs have been laid correctly and the mortar has dried down. Never start pointing a patio if your mortar is fresh. Let it dry for at least 24 to 48 hours. Clean the joints properly and remove any loose debris or mortar residue that you see.
Step 2: Pre-Wet the Surface
Use your garden hose or a water can to lightly dampen the surface of the slabs. This will prevent the grout from sticking to the surface of your paving slab, causing permanent stains.
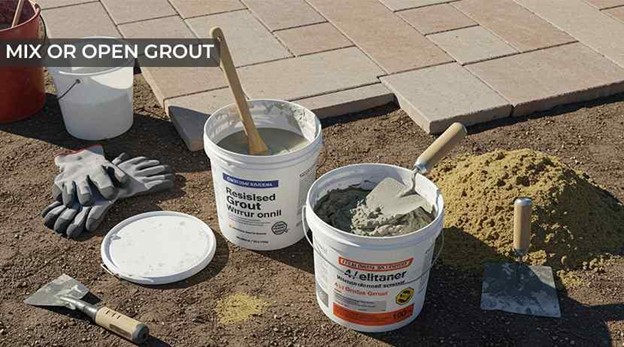
Step 3: Mix or Open Grout
If you are using a resin-based ground, simply open and stir the material. But, if you are using sand and cement, mix a ratio of 4:1 sand to cement. Add just enough water to create a workable consistency of the paving jointing compound.
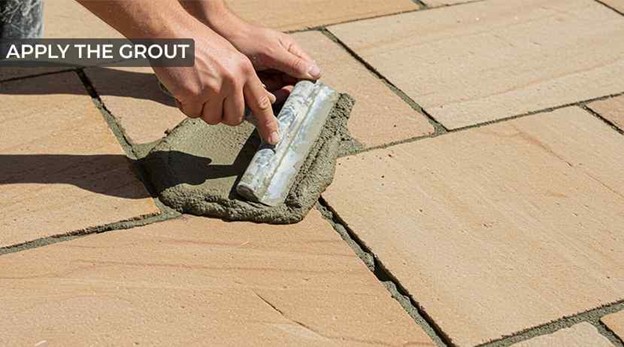
Step 4: Apply the Grout
Using a squeegee or pointing trowel, pour or brush patio grout into the joints of your patio slabs. Work in small sections to avoid the grout drying before you finish the job.
Step 5: Compact the Joints
Press the grout firmly into the open gaps using a pointing tool. It will eliminate all the air bubbles/pockets and ensure that the grout is super durable.
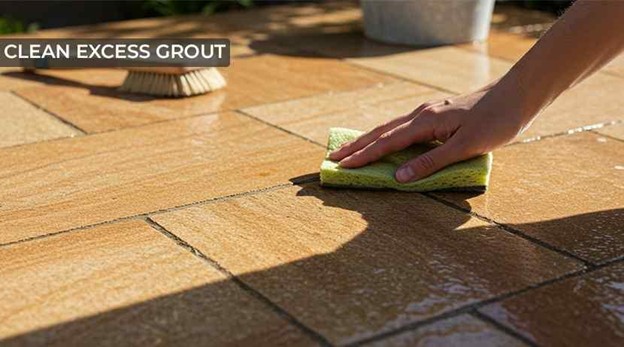
Step 6: Clean Excess Grout
How to clean Indian Sandstone after grouting? After you are done grouting, wipe off the excess grout immediately using a soft brush or a damp sponge. For resin-based pave joint compound, avoid over-washing as water may dilute the grout mix.
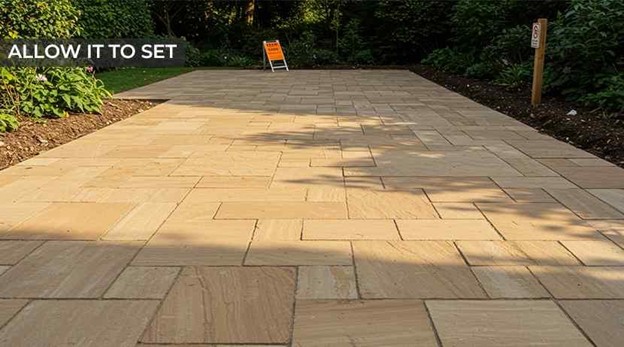
Step 7: Allow it to Set
Let your Indian Sandstone grout cure for another 24 to 48 hours as per the landscaper’s instructions. Avoid walking over your patio during this period.
Expert Tips for Perfect Grouting
If you are laying Indian Sandstone slabs in your patio, or have already laid and are planning to grout, make sure to:
- Pick a dry day to work in order to avoid premature setting.
- Use a pavement jointing compound colour that goes exactly with your sandstone shade.
- Preseal Indian sandstone before if you are using a traditional mortar-based grout to prevent staining your Indian stone slabs.
Should You Seal Sandstone Slabs Before Grouting
Yes. Pre-sealing sandstone is highly recommended, especially if you are using traditional sand and cement grouting for paving. This natural stone type is very porous, and cement can leave stubborn stains that are almost impossible to remove once they are cured.
Benefits of Sealant Before Grouting
Applying a breathable sealant before grouting:
- Protects your sandstone from staining.
- Makes cleaning your sandstone slabs easier during installation.
- Enhances the colour tones of your natural sandstone slabs.
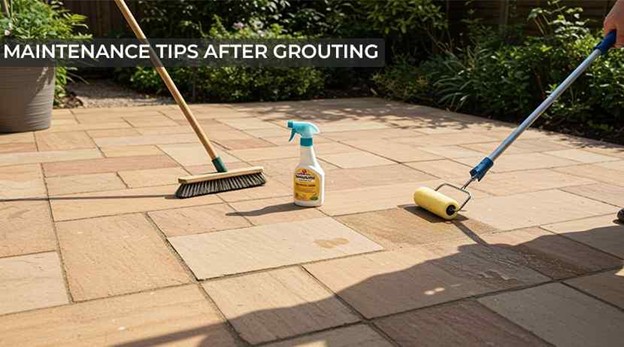
Maintenance Tips After Grouting
Once you complete grouting patio slabs, it is essential that you do the routine care.
- Sweep your paving slabs regularly to prevent dirt buildup on your patio.
- Clean your outdoor tiles with pH-neutral cleaners to avoid damaging the grout.
- Reseal your garden patio slabs every few years for long-term protection.
Final Thoughts
Grouting Indian stone paving might seem like the final touch to laying paving slabs; however, it is more than that. It decides the overall look and neatness of your outdoor space. Knowing how to grout Indian Sandstone will allow you to transform your Indian Sandstone patio from merely “laid” to “complete”.
Choose the right grout for paving and apply it correctly, and you will achieve a patio that not only looks stunning but also stands the test of time in unpredictable UK weather.
If you are looking for premium paving materials or want to buy Indian Sandstone paving slabs, Royale Stones is a one-stop shop for all of your needs, including affordable Indian Sandstone slabs, sealants, and accessories for your next outdoor project.
Frequently Asked Questions
Q: How to grout Indian sandstone paving?
A: Clean your joints, remove excess mortar and debris, damp your sandstone slabs, and apply resin or mortar-based grout. Compact it well, and allow it to cure for 24 to 48 hours.
Q: What grout do you use for sandstone?
A: Resin-based grout is one of the most popular and go-to grouting materials for your Indian Sandstone. They are easy to use, stain-resistant, weatherproof, and dry down instantly when in contact with air.
Q: How to grout between paving slabs?
A: Use a squeegee or a trowel to fill the joints. Ensure that it’s compacted, and remove excess grout before it dries down, as it can stain your paving slab permanently.
Q: What is the best paving grout for Indian stone?
A: A high-quality resin-based grout works best for Indian Sandstones as they are specially formulated for natural stones.
Q: Should I seal sandstone slabs before grouting?
A: Yes. Presealing your Indian Sandstone helps in preventing stains and makes cleanup of the excess grout much easier during the installation process.