


Porcelain Tile Installation
Guide for Laying Porcelain Pavers
How to Lay Porcelain Pavers (High Quality Porcelain Pavers only)
Installation on Semi-Wet Mortar Mix
1. Measurement
Take a proper measurement of your patio space and add 10% for off-cuts.

2. SUB-BASE
100mm sub-base be containing granules of compacted limestone, gritstone or any other such stone granules suitable.
Dig out the place and put this sub-base in the area in which you are putting paving slabs.
3. BASE
30mm - The main mix mortar base which consists of grit sand and ordinary portland cement (OPC) in the ratio of 4:1 or stronger.
To check please ensure that mortar is binding together and is not watery.
4. Making the Wet Bed for Pavers
Apply the base mortar on the sub-base. Level the bed properly as this will carry the slabs.
Judging the right level of the bed and getting the right degree of rippling is very important so that the paving slabs can be placed properly at the same level thus eliminating inconsistencies.
5. Slurry Primer or SBR
Porcelain have very low water absorption and hence they need something to make the paving slabs stick properly to the base.
Use a brush to apply the slurry primer on the back of the paving slab properly just before placing it on full semi-wet mortar bed.
Ensure that you do not put any primer on the top surface.
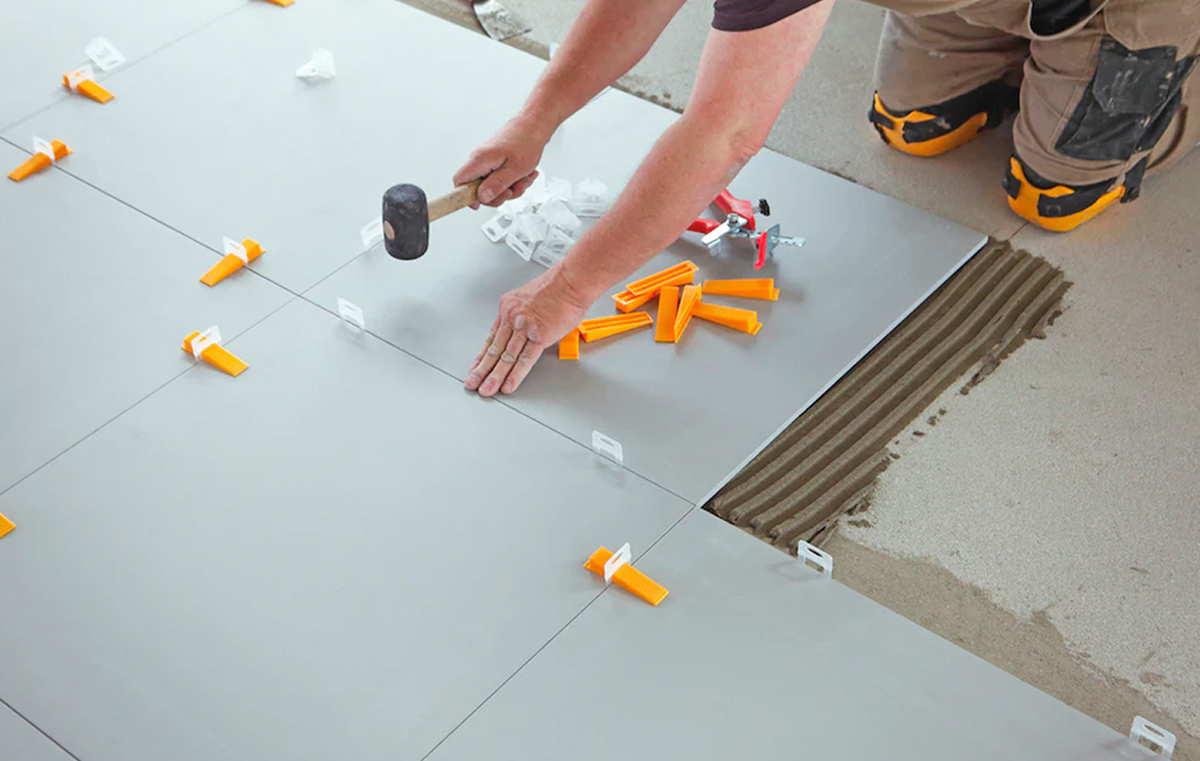
6. Tiling and Tapping
After the primer has been put on back of tiles they can be laid on the mortar.
Using a rubber mallet is very important here to tap the paving slabs to correct level. The entire beauty of paving slabs depends on laying them to correct level.
7. Spacers (Not Compulsory)
Most of our porcelain pavers have rectified edges, which means you can go as low as 2mm joint. However, we always recommend our customers to have a minimum of 4mm Joint as this gives a proper tiling effect and makes the patio look pristine.
8. Grouting and Final touch
We recommend quality porcelain grout as its impermeable and gives higher coverage. Remove any excess while grouting. Avoid foot traffic on the patio for 24 hours.
Installation on Solid Concrete Base
1. Base
The base here is pre-installed concrete or such hard base on which tiles can be affixed directly without any need of mix mortar or other things.
(The concrete base can be 70-100mm thick concrete (c7.5 or stronger) slabs or reinforced concrete.)
2. Â Specialist Tile Adhesive
The tiles can be laid on top of concrete or such hard levelled surface with the help of a tile adhesive, which is an outdoor grade polymer-modified cement-based adhesive.
This outdoor tile adhesive is spread over the concrete by a notched spreader to make sure that the depth of adhesive is uniform.
(The required thickness for the bedding is specified by adhesive manufacturer)
3. Â Tile Fixing
The tiles are than placed and pressed down on the adhesive. Pressing and fixing is done in a way to settle down falls and levels.
4. Grouting and Final touch
We recommend Porcelain Grout as its impermeable and gives higher coverage.
Remove any excess while grouting. Avoid foot traffic on the Patio for 24 hours.
Cutting of Porcelain Tiles:
Porcelain is a very hard product and it cannot be cut using a normal angle grinder or hand tools like chisels and hammers used for cutting stones.
We recommend using a wet tile cutter (we have tried: Rubi DC-250) with good quality, continuous porcelain blade (we have tried: Rubi SPT 250mm). Try scoring the tile first 2-3 times if you still find it hard to cut.
Despite the methods stated being a very dense product you might still find hard to cut, so please allow for wastage. We can't be responsible if your builder/tradesman is having more wastage than normal as some batches of porcelain can be a lot denser than the others.