How To Prevent Lippage When Tiling Floors
Quick Answer: Get the substrate flat before tiling, use tiles of the same batch, use a sensible layout, keep the grout joints wide enough for the tile, use tile levelling systems, fix with the right adhesive, agree on acceptable tolerance with your tiler before work starts. |
Have you ever caught your toe on a tile that was slightly higher than the one before it, without noticing it while walking over them? Or you may have come across dirt sitting in the corner of a floor tile that a cleaning brush cannot get out easily. Both are classic signs of tile lippage.
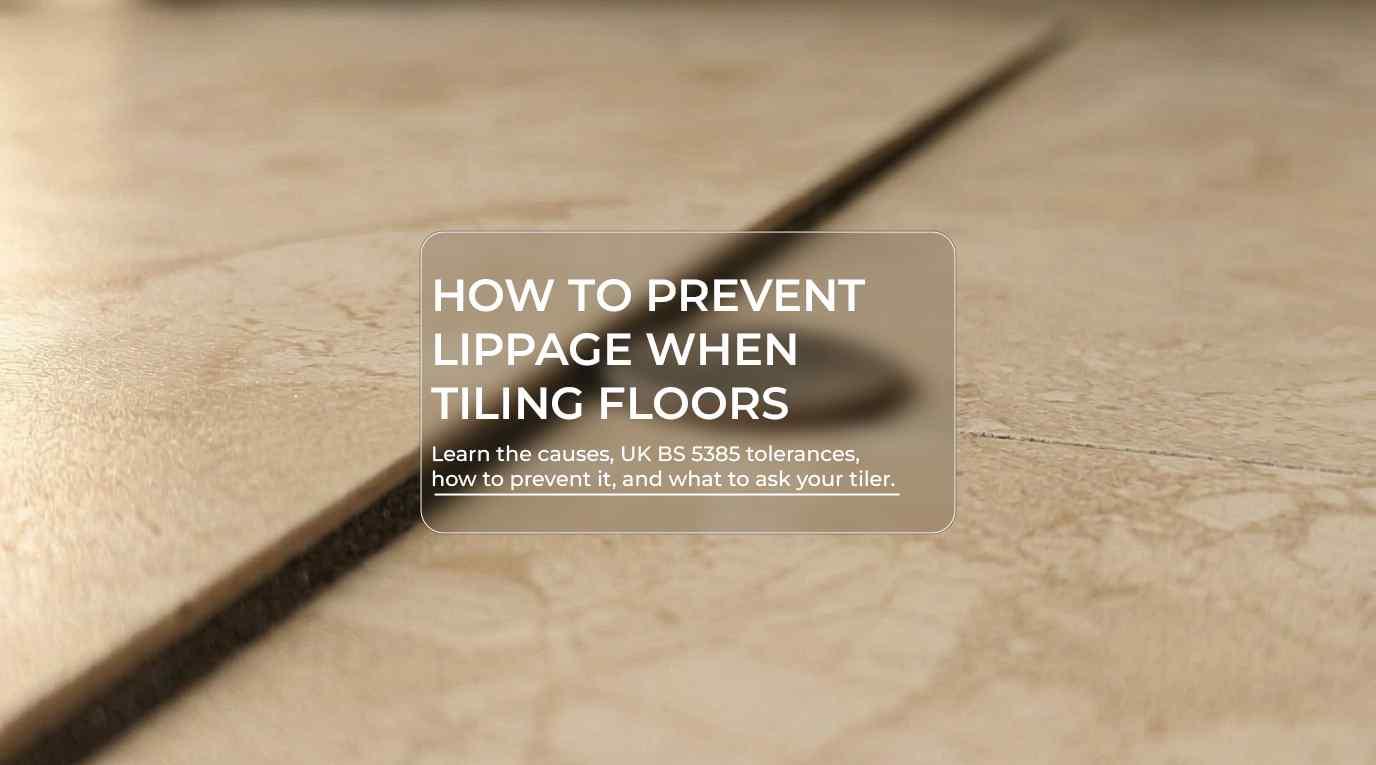
So what exactly is “Tile Lippage”? Tile lippage is when the edge of one tile is slightly higher or lower than the edge of the adjacent or preceding tile, forming a lip. You can also describe it as the height difference between the tiles, making the surface uneven.
In severe cases, tile lippage on floors causes trip hazards; in other cases, you can identify it if you see:
- Visible shadow along the grout joints
- Uncomfortable and uneven surface underfoot
- Areas that catch dust, hold water, or that cleaning equipment cannot get to easily
- Chipped edges of the tile
- Uneven reflection under directional lights
But why does tile lippage happen?
Reasons for Tile Lippage
Tile lippage can occur for several reasons, from warped tiles and uneven substrates to incorrect installation techniques. These issues can affect both floor and wall tiles, so understanding how to tile a wall correctly is useful when planning a tiling project.
1. Warped Tiles
If your tile has not gone through proper inspection, there is a high chance that you will get tiles that have expanded or developed a curve during the manufacturing process and have an uneven surface.
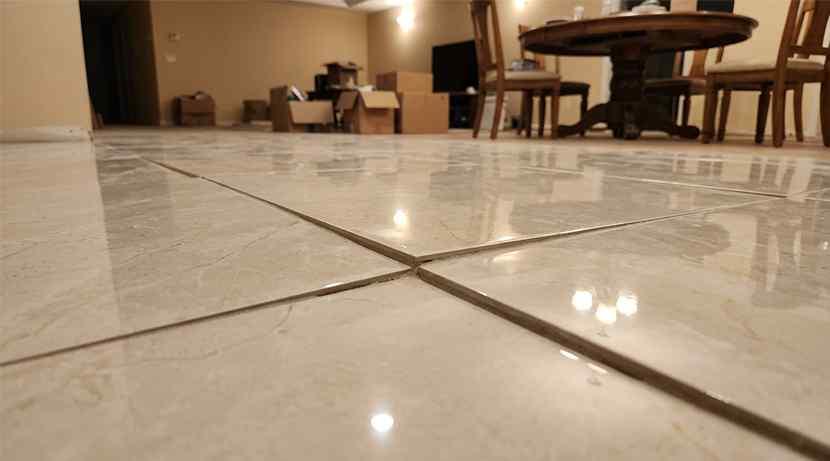
It is most common in large-format porcelain tiles as well as ceramic options. When used in a 50% brick bond pattern, the high centre of one tile may sit beside the lower ends of the neighbouring tile, exaggerating lippage, which a professional installation can’t even compensate for
2. Uneven Substrate
One of the most common causes of tile lippage is an uneven substrate for floors or walls. If your substrate contains high/low spots, hollows, ridges, or sudden changes in plane, there is a high chance that you will have tile lippage in those areas.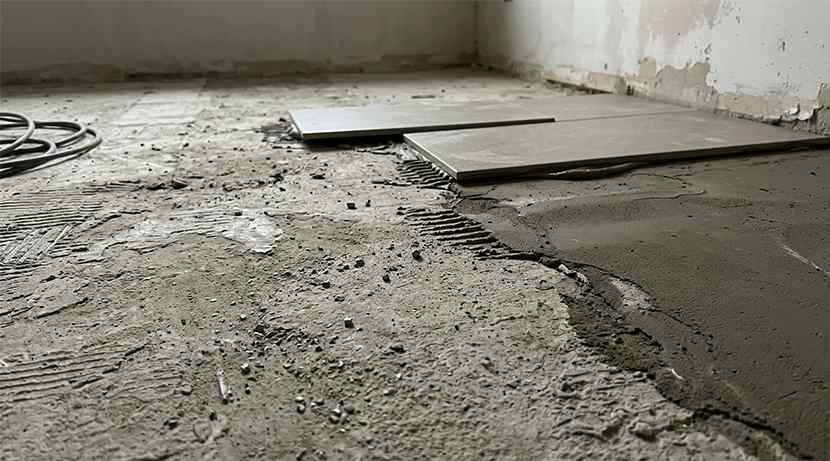
An installer may try to compensate for it by adding extra adhesive under individual tiles, but they still would create an inconsistent adhesive bed, making alignment even more difficult.
3. Poor Installation Techniques
Sometimes the tile lippage is solely due to an inadequate tile installation performed by your installer. The typical tile installation mistakes include:
- Rushing the preparation stage
- Setting out tiles without a dry-lay plan
- Making joints too narrow for the tile
- Not using a levelling system on tiles that need one
- Combing adhesive in the wrong direction, or with the wrong trowel, so the bed collapses unevenly
- Pressing tiles into partial coverage, leaving hollow areas that settle under load
4. Unsuitable Layout Offset
Long rectangular floor tiles laid with a 50% offset are the textbook recipe for lippage. Any bow along the length of the tile lines up with the dip on the tile beside it. Limiting the offset to around a third spreads the bow across the joint, so it is far less visible.
5. Movement and Flexing
Timber floors that deflect, screeds that have not fully dried, and underfloor heating that has been switched on too early can all move the tile bed after fixing, causing floor tile lippage. The tiles themselves are fine, but the bed beneath them shifts, and lippage appears days or weeks after the job looked perfect.
There is good news and bad news attached to it. The bad news is that if the tile is already installed and the mortar or adhesive is set and dried, it is almost impossible to fix. The good news is that you can prevent tile lippage from the start of the tiling project.
How Much Lippage is Acceptable in the UK?
It is guided by BS 5385, the code of practice for wall and floor tiling. But before you rely on these numbers, you need to know that the standard is a minimum benchmark, not a promise of perfection. The standard recognises beforehand that tiles themselves are not perfectly flat.
|
What
is Being Measured |
Commonly
Cited BS 5385 Tolerance |
|
Substrate flatness (checked with a 2m
straightedge) |
No gap greater than 3mm |
|
Finished tiled surface (2m straightedge with
3mm feet at each end) |
Straightedge not obstructed by tiles, and no
gap greater than 6mm |
|
Level difference across a joint under 6mm wide |
1mm maximum |
|
Level difference across a joint 6mm or wider |
2mm maximum |
How to Avoid Tile Lippage?
So, how to prevent tile lippage? Tile lippage can be prevented before and during the wall or floor tile installation process. Here is how:
1. Correct Substrate Preparation
Check flatness with a 2m straightedge in several directions. Anything beyond that needs correcting before tiling begins. Depending on that, it may mean:
- A self-levelling compound over concrete or mortar screed
- Grinding down the high spots
- Overboarding timber floors with tile backer board or plywood
- Using a decoupling membrane where there is movement risk
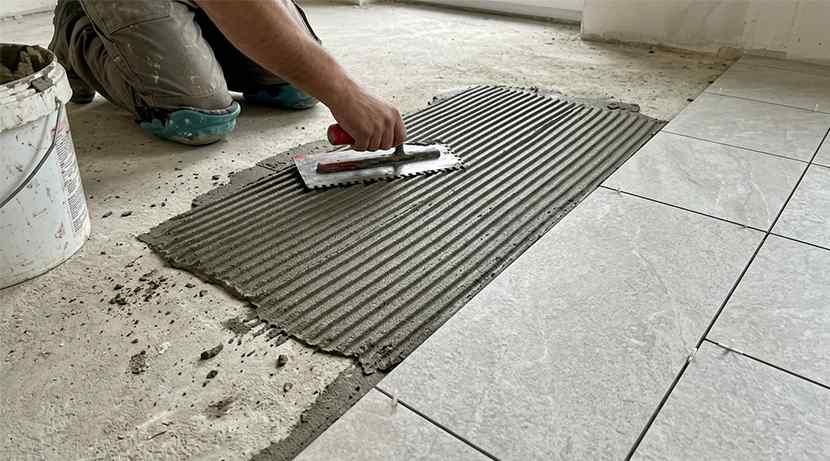
Homeowners often assume the tile is the hard part. In practice, most of the quality of a tiled floor is decided before the first tile goes down.
Large format tiles make this stage non-negotiable, so budget for preparation work as a part of the project, not as an optional extra.
2. Using Tiles from the Same Batch (Inspect Them First)
Tiles produced in the same batch share the same size/calibre and shade, which makes them far more consistent to lay. Before fixing, open several boxes and dry lay a few tiles. Lay a straight edge along the edges and across the diagonal to check for bowing. For porcelain tiles in large format, check for rectified edges.
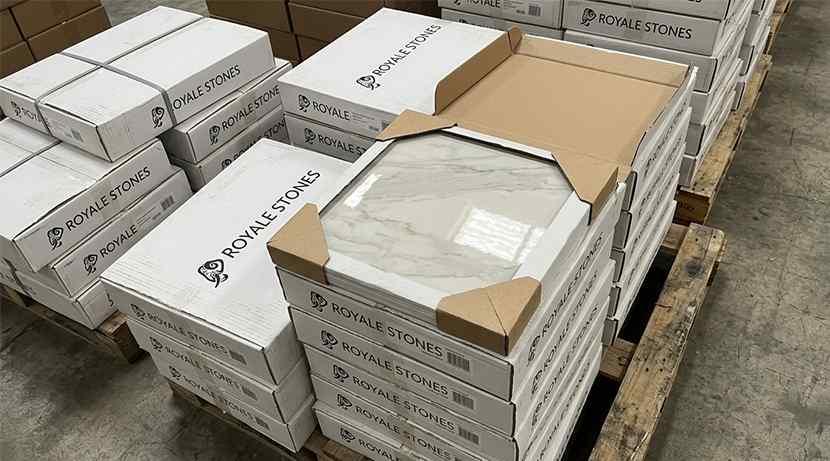
Pro Tip: Order 10% extra for cuts, breaks, diagonal layouts, and any tiles you reject on inspection.
3. Choose a Suitable Laying Pattern
Straight bond is the most forgiving for warped tiles because the adjacent edges line up with each other. If you want a brick or staggered look, keep the offset to roughly a third of the length instead of 50%. A third works noticeably better with any bow in the tile.
4. Use Appropriate Grout Joints
Narrow joints leave no room to absorb small differences in tile size and edge. Too tight joints, and every tolerance shows.
- Leave a sensible 2mm joint for rectified tiles and 3mm for large format tiles.
- Leave wider joints for calibrated tiles to absorb size variation
- Natural stones such as chiselled and tumbled stones need wider joints and hide small level differences bigger than razor-sharp rectified edges.
Always follow the tile supplier’s recommendations on the right tile sizes and joint width and the grout manufacturer’s guidance. Keep joints a consistent width throughout. They should not wander.
5. Use Tile Levelling Systems
Levelling clips and wedges pull the edges of neighbouring tiles into the same plane while the adhesive sets. They are the single most effective piece of kit for preventing lippage and are worth using on almost every floor, particularly with tiles 300x600mm or larger.
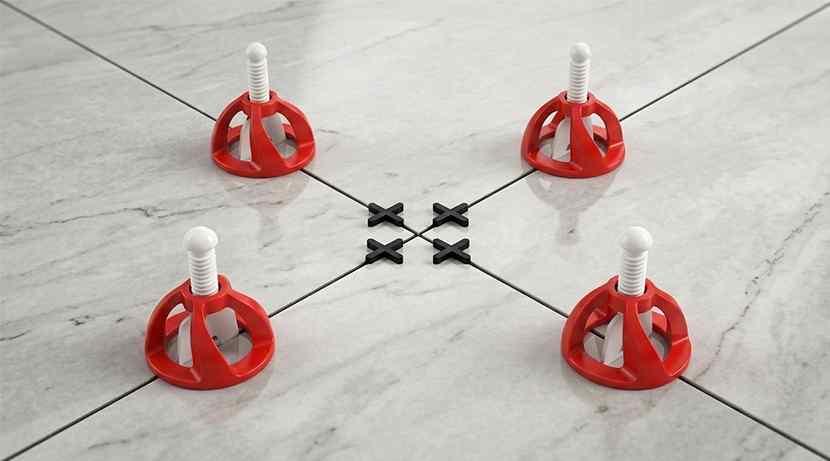
However, they have limits. A levelling system cannot correct poor substrate or heavily warped tiles. It works within a range of roughly a millimetre or two, so it supports good preparation and does not replace it. Leave the clips in place until the adhesive has cured, then knock them off along the joint lines.
6. Apply Adhesive Correctly
Use an adhesive that is suitable for the tile and location. For porcelain, large-format tiles and floors with underfloor heating, a flexible cement-based adhesive is normally specified. Look for a C2 classification under BS EN 12004, and S1 or S2 where you need extra flexibility.
Then:
- Match the notched trowel size to the tile (Deeper notch for large tiles)
- Comb the adhesive in straight and parallel lines in a single direction so that air can escape as the tile is pressed down.
- Back-butter the large format tiles so there are no voids
- Aim for full coverage under every tile
- Work within the adhesive’s open time.
It is crucial, especially in bathrooms, wet rooms, and kitchens, where voids trap moisture and can result in loose or cracked tiles. If you are tiling bathroom tiles onto the floor of a shower room or wet room, the substrate needs to be properly tanked (waterproofed) before any tile goes down.
|
Looking for best wall tile adhesives? Find out here: What Tile Adhesive to Use for Walls |
Choosing Tiles That Reduce Lippage Risk
Your tile choice has a bigger effect on lippage risk than most homeowners realise.
|
Tile
type |
Lippage
risk |
What
to do |
|
Small and medium ceramic or porcelain (up to
about 300 x 300mm) |
Low |
Standard preparation and spacers are normally
enough |
|
Rectified porcelain, medium formats |
Low to medium |
Use a levelling system and 2 to 3mm joints |
|
Long rectangular tiles (such as plank or
wood-effect) |
Medium to high |
Limit the offset to about a third and check
each tile for bow |
|
Extra large tiles |
High |
Needs a very flat substrate, levelling system,
back-buttering and an experienced tiler |
|
Polished or high-gloss tiles |
Higher visibility |
Lippage shows more under raking light, so
tighten your target tolerance |
|
Natural stone tiles with chiselled or tumbled
edges |
Lower visibility |
Use wider joints and a consistent bed |
If you are still choosing, it helps to browse floor tiles by format and finish, keeping these trade-offs in mind. A matt finish and a moderate size are the easiest to lay well. For natural stone tiles, the thickness and surface can vary from piece to piece, so allow for that in the bed and joint width and sort and dry-lay the stone before fixing them over adhesive.
In family kitchens, kitchen tiles take heavy traffic and are cleaned often, so lippage is both a trip hazard and a cleaning problem. Choose a slightly smaller format or a matt finish tile and spend more on preparation.
Does Lippage Happen on Walls Too?
Yes. The principles are the same, and the same BS 5385 across-joint tolerance applies. Walls are often less flat than floors, particularly in older UK homes, where uneven plaster or plasterboard has been fixed with dabs.
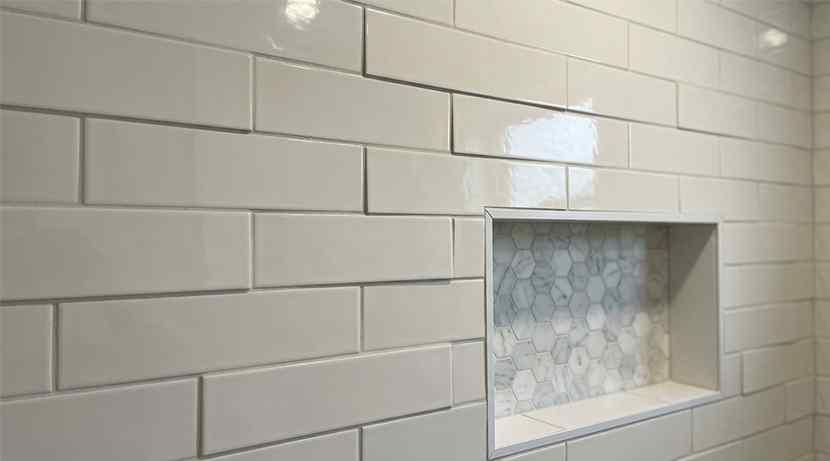
Large wall tiles and gloss finishes make any lippage obvious, especially under downlights or a side-lit window. Check wall flatness with a straightedge, plane or skim out high spots, and use levelling clips on larger formats just as you would on the floor.
What Should Your Tiler Discuss With You?
A professional tiler must have these conversations with you before they pick up a trowel. If yours does not raise them, ask.
|
Topic |
What
to agree, and why |
|
Substrate |
Flatness checked with a 2m straightedge, and
who pays for any levelling. A poor base causes most lippage. |
|
Tile Inspection and Layout |
Dry-lay from several boxes, check for bow and
keep the offset to about a third. |
|
Joint Width |
The width recommended for your tiles, kept
consistent. Too tight and every tolerance shows. |
|
Fixing |
C2 flexible adhesive, the right trowel,
back-buttering, full coverage and a levelling system. |
|
Movement and Heating |
Perimeter gaps, movement joints, and
underfloor heating commissioned before tiling and off during fixing. |
|
Wet Areas |
Tanking before tiling in showers and wet
rooms. |
|
Tolerance and Sign-off |
BS 5385 or tighter (tighter for gloss tiles),
with a joint inspection before grouting. |
|
Spares and Cure Time |
Spare tiles from the same batch, and no foot
traffic until the adhesive's stated cure time has passed. |
A Useful Habit: Ask for the preparation, adhesive type, and tolerance to be written into the quote. A tiler who is confident in their method will not mind.
UK Regulations and Standards Worth Knowing
British Standards are voluntary codes of practice, not law, but they are the benchmark used by tilers, surveyors and trade bodies when a job is questioned. These are the ones that matter for floor lippage:
- BS 5385-1 and BS 5385-3: The codes of practice for the design and installation of internal wall and floor tiling, including substrate flatness and tolerances across joints.
- BS EN 14411: The product standard for ceramic tiles, including permitted manufacturing tolerances for size and flatness.
- BS EN 12004: Classifies tile adhesives (for example C1, C2, and the S1 and S2 flexibility grades).
- BS EN 13888: Classifies tile grouts.
- BS 8204: Covers in-situ floorings and the surface regularity of screeds that tiles are laid onto.
- BS 7976 / HSE pendulum guidance: Relevant to slip resistance, particularly in wet or commercial areas.
- Approved Document M (Building Regulations): Relevant to accessibility in new work and some conversions, where abrupt level changes on routes are a trip hazard.
- Workplace (Health, Safety and Welfare) Regulations 1992: In commercial premises, floors must be free from hazards that could cause someone to trip.
- Housing Health and Safety Rating System (HHSRS) and the Homes (Fitness for Human Habitation) Act 2018: Landlords in England must keep rented homes free from serious hazards, and falls on level surfaces are one of them. Visible lippage can become a landlord compliance issue.
- Consumer Rights Act 2015: Services must be carried out with reasonable care and skill. If lippage is due to poor workmanship, this is the legal route for a complaint.
Check the current edition of each standard before relying on it for a specific project or dispute.
Final Thoughts
Preventing tile lippage is all about decisions made early: a flat substrate, tiles checked before fixing, a layout that suits the tile, sensible grout joints, levelling systems and a proper adhesive bed. None of it is difficult, but all of it takes time, and most of it happens before the tile is visible.
If you are planning new indoor floor tiles, choose tile format and finish while keeping installation in mind and talk through the points above with your tiler. If you are still not sure about your tile decisions, visit Royale Stones showroom, see tiles for yourself, talk to our experts about your custom project and take specialist recommendations.
Frequently Asked Questions About Tile Lippage
How Do I Measure Tile Lippage?
Place a straight metal edge across the joint from one tile to the next and check for a gap under the edge, or use a feeler gauge or thin drill bit. To check overall flatness, use a 2m straightedge and measure the largest gap beneath it. Running a bare hand or foot across the joint is a useful quick check.
Can Tile Lippage Be Fixed After Installation?
Once the adhesive has cured, the realistic fix is to lift and reset the affected tiles, ideally after correcting the substrate. Grinding the high edge is rarely suitable for glazed porcelain because it removes the glaze. Filling the gap with grout does not solve the problem.
What Grout Joint Width Reduces Lippage?
Wider joints absorb more variation between tiles. For rectified large-format tiles, 3mm is a sensible minimum, and calibrated or irregular-edge tiles need more. Follow the tile supplier's guidance and keep the joint width consistent.
What Offset Should I Use for Rectangular Tiles?
Keep the offset to around a third of the tile length for long rectangular tiles. A 50% offset places the high centre of one tile beside the low end of the next, which exaggerates any bow.
Does Underfloor Heating Cause Tile Lippage?
It can contribute if the floor is heated too early or the wrong adhesive and grout are used, because the bed can move. Use a flexible adhesive and grout, commission the system as the manufacturer advises and switch it off while the tiles are fixed and curing.
- Bathroom Tiles
- Porcelain Paving
- Bathroom Vanity Units
- Floor Tiles
- Kitchen Tiles
- Garden Paving
- Porcelain
- Wall Tiles
- Natural Stone Paving
- Onyx Tiles
- Paving Slabs
- Sandstone Paving
- Marble Tiles
- Terrazzo Tiles
- Anti Slip Tiles
- Wood Effect Paving
- Paving
- Exterior Floor Tiles
- Outdoor Tiles
- Brick Effect Tiles
- Outdoor Porcelain Tiles
- Bathroom Basins
- Stone Effect Wall Tiles
- Indoor Tiles
- Vinyl Flooring
- acoustic wall panels
- Outdoor Porcelain Paving
- Dijon Limestone
- Vanity Units
- Knowledge Base
- Inside Out Tiles
- Porcelain Paving Slabs
- Slate Effect Tiles
- Porcelain Tiles
- Concrete Effect Tiles
- External Wall Tiles
- Wood-Effect Tiles
- Victorian Floor Tiles
- Luxury Tiles
- 3D Split face Wall Tiles
- Tile Installation Tips
Recent Post
-
 October 28th, 2026
-

Large-Format vs Small Paving Slabs: Which is Best for Your UK Garden?
October 9th, 2026